Sups Delicious Zucchini Recipes

An ode to a summer love.  To a food that is good for you and so, so tasty.  Versatile and packed with protein and vitamins…zucchini, how I love thee!  If anyone has other recipes for this fabulous vegetable, please share!!

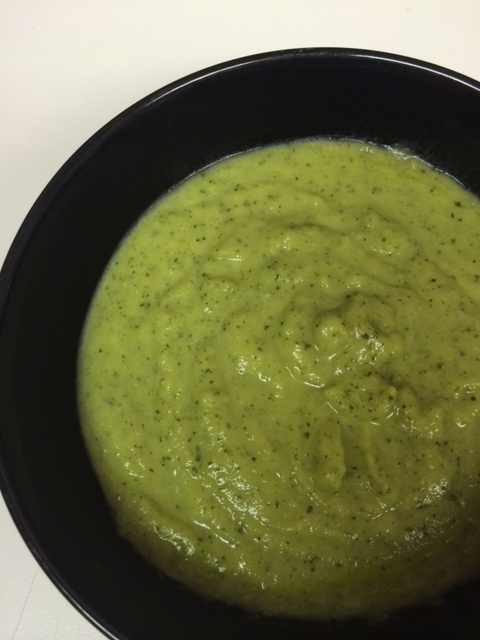
Zucchini Soup

This is my ABSOLUTE favorite…it’s actually “soups” delicious (see what I did there?!).  Anyway – every time I finish a bowl I’m kind of baffled that I just ate a whole zucchini (or two) in liquid form.  Wow!  Such veggie!  So health!

photo(1)

You will need:
2 Large or 4 small zucchini
1 Large onion
2 Cloves garlic
2 Tablespoons olive oil
1/4 Cup water
Salt and pepper to taste
Blender

1. Cut up the zucchini, onion, and garlic.  Steam them for 15 minutes* – or until the zucchini is easily pierced with a fork and the onion is turning translucent.

2. Dump your steamed veggies in a blender and add the water and olive oil.  Purify that ish.

3. Add salt and pepper to taste (it’s good without it – but amazing when you add salt, IMHO).

I first found this recipe here years ago http://www.justcleansing.com/modeldetox.htm …I have a feeling it may be low in calories.  😉

*To steam, I put an inch of water in a large pot, put in my steamer basket with the veggies, put on a lid and bring the water to a boil.  Then I turn it down just a bit, but keep it boiling for all 15 mins.

Parmesan Zucchini Chips

These are a summertime, dinner on the deck favorite in my house.  And my two year old will eat them, anytime I can get something green in her it’s good – even if they are covered with cheese.
photo 1(6)
Y
ou will need:
2 Zucchini, sliced quarter inch thick
Olive oil
Wedge of parmesan, shredded
Salt and pepper
Cookie sheet and tin foill

1. Turn on your broiler and put your oven rack at the top rung.  Spread tin foil on a cookie sheet.  Brush the tin foil with olive oil (don’t be stingy!)

2. Lay your zucchini slices in a single layer.  Brush the zucchini with olive oil.  Lightly sprinkle on salt and pepper.

3.  Broil for 5 minutes.  Take out of the oven and cover with parmesan.

4. Broil another 5 minutes – or until the parmesan starts to brown slightly.  Yummmmm

Grilled Zucchini Spears

Nice and easy – a staple on our grill all summer long.

You will need:
Zucchini (I normally do four)
Butter
Salt and pepper
As many sheets of tin foil as you have zucchini (big enough to wrap around the zucchini)

1. Cut the zucchini in half the long way, and then each half the long way again – so you have four spears.

2. Spread butter on each of the spears, sprinkle on salt and pepper.

3. Put the zucchini back together as best you can and wrap tight in tin foil (one piece of tin foil per zucchini).  Wrap it the long way and then fold up the ends so the butter doesn’t seep out.  Onto the grill!

4. Grill on high (my hubs says 500 degrees), turning every 3 minutes or so for 10-15 minutes, or until they start to get squishy.  You’ll be able to hear the butter sizzle.

Enjoy!
Clean Eating Blueberry Scones – Paleo Recipe

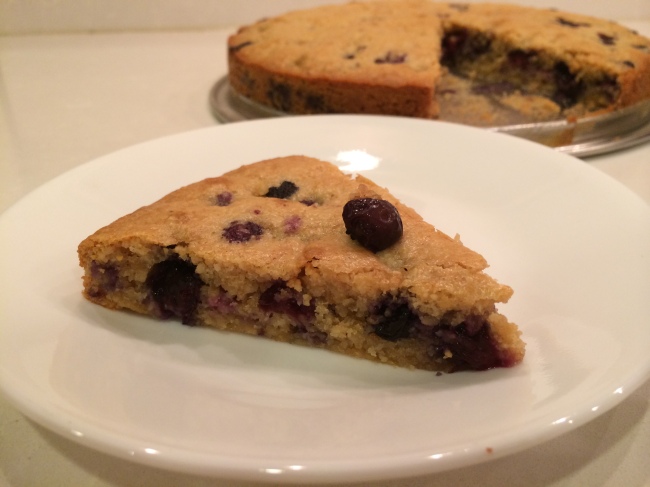
I made these scones tonight, and I’m still a little bit in disbelief that they’re so healthy.  Protein, fruit, no flour.  Super good!

Image

Ingredients:
1 1/2 cups cashews
1/4 cup arrowroot starch
Pinch of salt
1 tsp baking powder
1 cup blueberries
1/4 cup coconut oil
3 tbsp maple syrup
2 tsp vanilla
1 egg

1. Grind up your cashews as fine as possible. We use a small Ninja (ha ha, that is a funny sentence).
Image

2.  Pour chopped cashews into a large mixing bowl, add arrowroot starch, salt and baking powder and mix.  I had trouble finding arrowroot starch – no luck at the Target by me.  Byerly’s came though.
Image

3.  Add blueberries.  I used fresh, my friend who referred this recipe used frozen – both worked fine.

4. Mix coconut oil (warmed, so it’s in liquid form) maple syrup, vanilla and egg.  Add to the dry/blueberry mixture.

5. Pour into pan.  The blog this recipe came from (http://fedandfit.com/2013/07/28/paleo-blueberry-scones-2/) suggested a 9″ metal pan with parchment paper lining.  I had neither said pan nor paper, so I used a spring-form (cheesecake) pan.  I lightly greased the bottom to make up for no paper.
Image

6. Bake at 350 for 30 minutes, or till light golden brown.  Since I had the wrong pan and no paper, I did 325 for 33 minutes.  Worked fine, but I’m wondering if it wouldn’t have risen more had I used the proper tools.  Oh well, still delicious!

Enjoy!
Image

Super Simple Taco Salad

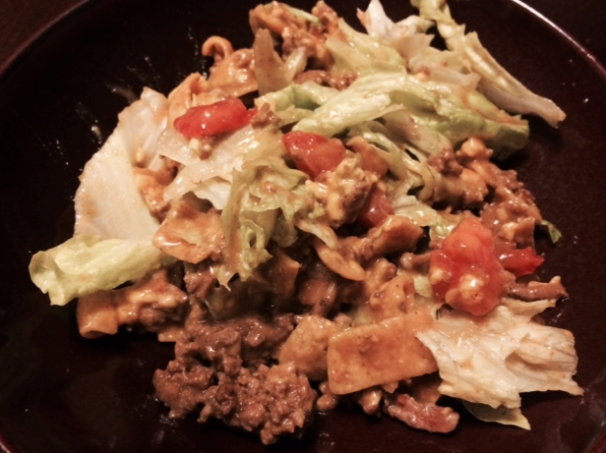
I got my mama to make this taco salad when she was visiting for the holidays.  It was one of my faves as a kid!  And while I wouldn’t call it healthy, it’s a good, super tasty way to get a decent amount of veggies into your family.

Image

All you need:
Medium head of lettuce
6 oz cheese (I like cheddar, my mom likes American b/c it melts better)
1lb ground beef
1 pkg taco seasoning
1 large tomato, chopped
2 cups Fritos (more if you’d like)
ingredients

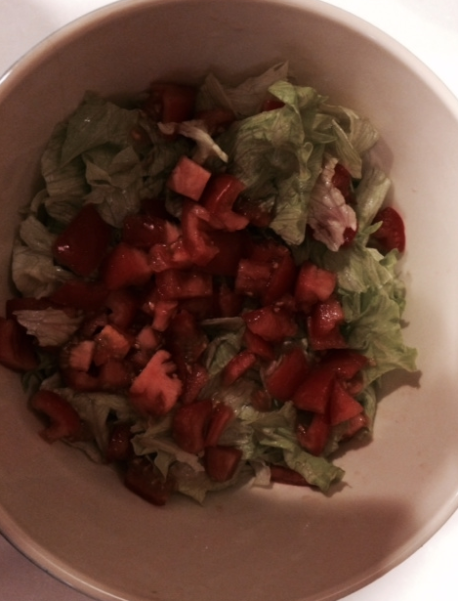
1. Brown your ground beef.  while you’re doing that, cut up your lettuce and tomato and put in a large mixing bowl.
Image

2. Season meat with taco seasoning per the packet directions (except add 1/4 cup extra water).  While you’re doing that, shred your cheese.

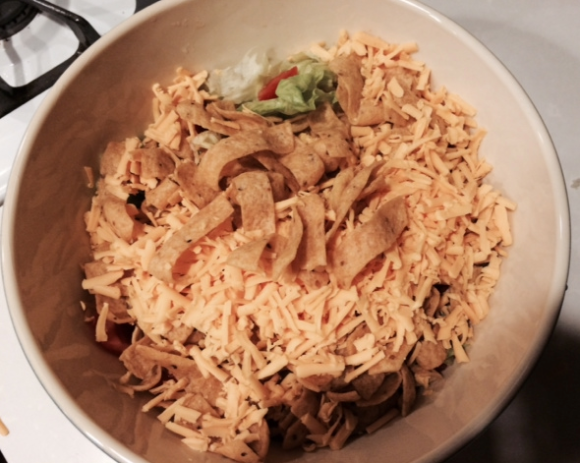
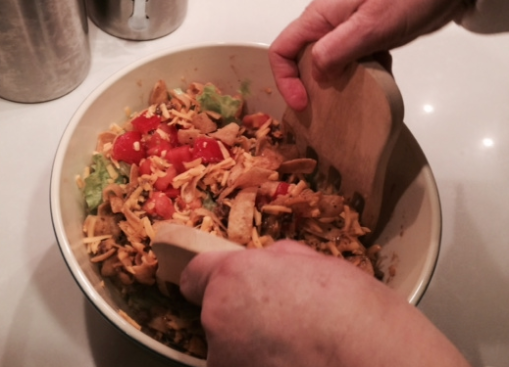
3. Add the cheese, Fritos and taco meat to the large mixing bowl, and stir it up!
Image

It’s much easier to mix if the bowl is big enough you don’t have to worry about slopping all over your counter.
Image

The warm meat will melt the cheese a bit, and the extra water allows everything to get nice and coated in taco-y seasoning.  Enjoy!

Diving Into Clean(er) Eating

I’ve been thinking about getting my family to eat cleaner for some time now.  If you’re like me, a not particularly health-minded person, it can be really confusing as to where to start – because there are SO many articles and opinions, and according to many of them it seems that basically everything you’re eating is killing you (this may be true).  I got overwhelmed and made no changes.  But every time I eat junk or drink a pop, I feel a little bit guilty and decided I had to do SOMETHING.  So I put it out to the greatest crowdsourcing tool we have – Facebook – to get some thoughts from friends who are cleaner eaters (thanks Dan, Lauren and Jenna!) and had a conversation with Joel to set our priorities.  Here is where our family is starting:
.

1. Coconut Oil for cooking instead of vegetable or canola

A couple of my daughter’s therapists have talked about the benefits of coconut oil.  One suggested it was good for concentration, another said that her chiropractor suggested everyone use it – benefits to joints, etc.  I don’t believe any of these benefits are proven, but either way, it isn’t as toxic as vegetable or canola oil.  I was worried about it adding a coconut-y taste to our food, but I’ve made scrambled eggs and french toast with it in the last couple days and didn’t notice anything – and I actually thought the french toast cooked more evenly than it does when I use butter.  Care2 has a nice summary of the benefits http://tinyurl.com/l6zqmk3
Screen Shot 2013-12-30 at 8.45.02 PM
Coconut oil is solid at room temperature but melts quickly
.

2. No more pop and juice

This one seems obvious.  Sugar, empty calories, bad for your teeth (I’m sure we’ve all heard of the tooth that deteriorated when left in a glass of cola).  At the beginning of my current pregnancy, I was drinking lots of orange juice because I’d heard folic acid was good for baby’s brain development.  Unfortunately, orange juice (or anything acidic for that matter) made me toss my cookies.  I asked my doctor what I could do to make up for it, since I couldn’t drink the juice, and she said “Eat an orange.  I have no juice i my house, it’s not good for you.  I wouldn’t care if you never had another glass of juice in your life.”  Disclaimer: there certainly are healthy juices – I’m talking the sugar laden ones.  I don’t plan on giving up V8.
.

3. Organic milk and fruit (especially fruit where you eat the skin)

Ugh, the growth hormones, the fertilizers, the pesticides.  Just thinking of this makes my stomach turn.  We would buy organic milk for our daughter and drink regular ourselves, and once I got knocked up for the second time, we realized that that was just silly.  Unfortunately organic milk is expensive – over $6 per gallon in my corner of the world :-/.  But I feel so much better about putting it into my body and the body of my growing baby.  And as far as organic fruit goes, you have to eat it fast, because it goes bad quickly (like food is supposed to), but there are definitely ways to prioritize if you don’t want to take the plunge completely.  Fruits with thick coverings that you don’t eat, like bananas, avocados, and kiwi, stand up better against pesticides.  There are tons of articles about this if you want to read more.  We eat a lot of strawberries, blueberries, and apples in our house – so we buy those organic.  I read the book Skinny Bitch a few years ago, and while I don’t agree with everything they say and I don’t think eating better is all about being skinny – seriously, my non-pregnant body wants to be 150lbs and that’s all there is to it – they do have some good points about considering where the food you’re eating is coming from.
.

4. Humane-certified eggs

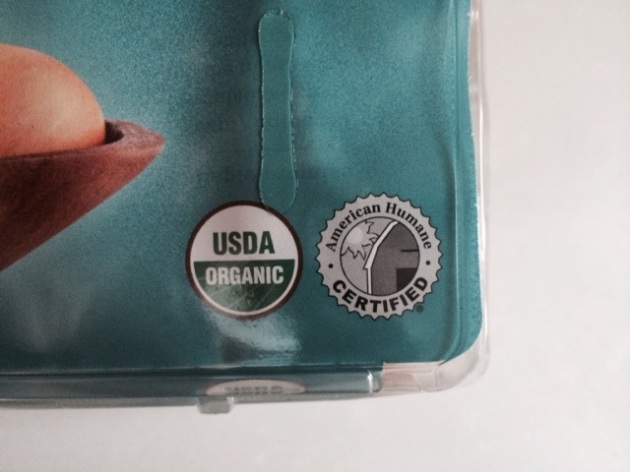
I feel very strongly about this one.  And humane certified animal food in general, but I’m not crazy about meat and I am crazy about eggs, so that is where we’re starting.  Besides being pumped up with growth hormones, etc. sometimes animals in factories where mass amounts of food for humans are produced are just plain and simply treated horribly and live miserable lives.  Chickens are kept in cramped, confined conditions for their WHOLE LIVES, sometimes with their beaks cut off so they don’t peck each other since they’re jammed so close together.  There is one chapter in Skinny Bitch dedicated to the treatment of animals in large facilities – it’s enough to make you cry.  The tough part is knowing if the meat you’re eating comes from a place like this, or a farm where the animals are treated humanely (I’m from Iowa, I know lots of these exist).  One way to tell with eggs is to look for the American Humane Certified seal.  The Targets by us carry these eggs, the brand is simply balanced.
Image
You can find out what farms have to do to earn this seal here: http://tinyurl.com/mrpblnj
.
5. Real cheese
It makes me sad, but American cheese is super super processed.  I really like it.  Fortunately, I really like a lot of other kinds of cheeses, so it shouldn’t be too hard to cut out.  When I buy cheese, I now look at the ingredients – milk, vinegar, enzymes, salt, good.  Cheese product, coloring, etc. bad.  To quote my friend Lauren on processed food in general: “Also, I try and not look at that stuff as ‘food.’ Think of it as office supplies since it’s from a factory made months ago. Not a farm or a kitchen.”  Smart!
.
Admittedly, this list is a little jumbled.  Number four in particular seems to stick out on it’s own – but like I said, in order to make a change, you have to care about the changes you are making, and this is the right start for my family.  This will be a life change and I have a lot to learn.  The right start for you might be different, and I’d love to hear what people are doing!
.
Some other books friends of mine recommended re: cleaner eating:
Never Be Sick Again
Practical Paleo

Easy Breakfast Pockets

I remember making this recipe when I was just a kiddo – it was in a book of children’s recipes my mama got for me.  The book is long since gone, but I still love this for breakfast.

Image

Ingredients

8oz can refrigerated crescent rolls (I use Pillsbury crescent rolls)
4oz American cheese
3 eggs
Splash of milk
2-4 slices cooked bacon

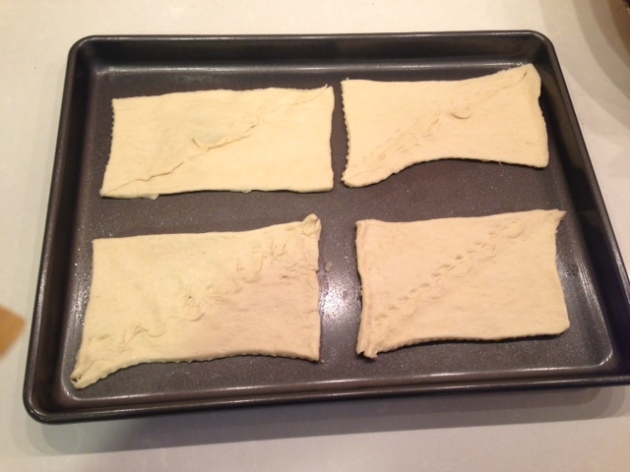
1. Preheat oven to 375.  Separate the eight crescent rolls in your package into pairs to make four rectangles.  Press the seams together.

Image

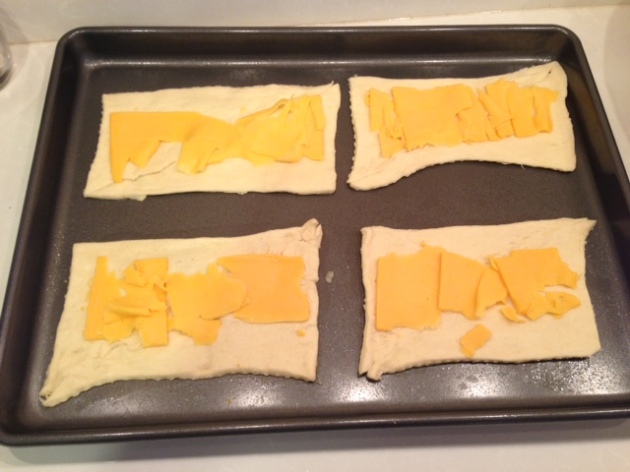
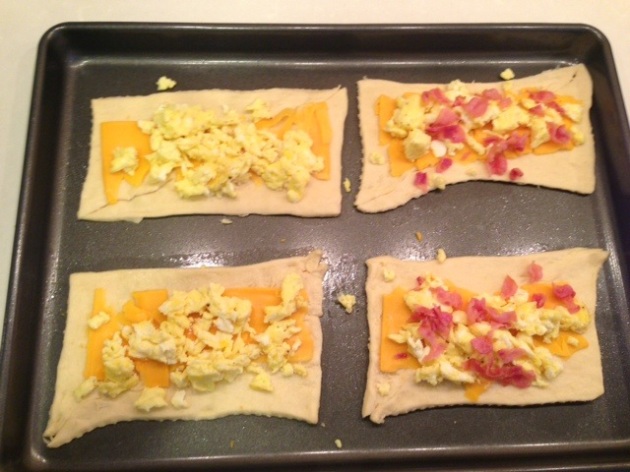
2. Slice your cheese, lay out across each pressed together rectangle (our slicer was dirty, so I used a plane.  In hindsight, I should have just cleaned the slicer).

Image

3. Mix your eggs and milk, and add a dash of salt and pepper – scramble your eggs, and layer on top of the cheese.  If you’re using it, crumble your cooked bacon and layer on top as well.  Note: I remember this recipe originally being with hard boiled eggs – half an egg per pocket.  I like it better with scrambled, but just incase you feel like trying something different.

Image

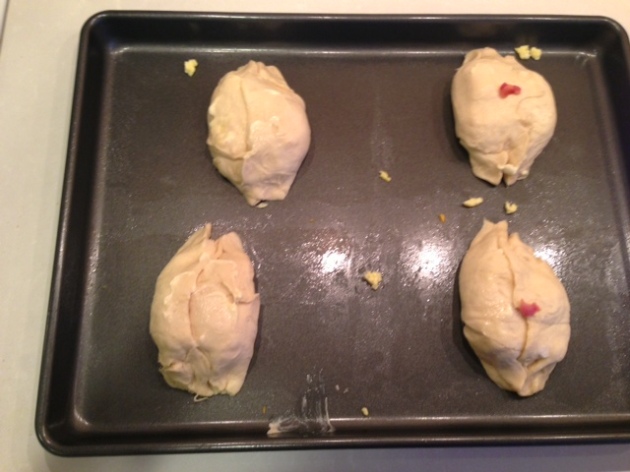
4. Pull the short ends together, pinch the sides and seal across the top as well as possible so the deliciousness doesn’t ooze out while they’re cooking.

Image

5. Bake 11-13 mins, or till golden brown.  They’re much better if the dough is just a bit crispy.  Enjoy!!

Image

Beef and Cornbread Squares

I haven’t done a recipe post in a long time – woohoo!  Gettin’ crazy on a Friday night.  I got this recipe from my mama – I loved it growing up, now my hubs and daughter love it too.  It’s a good one for a cozy fall night.

Image

Ingredients
1 lb ground beef
1 medium onion, chopped
1/3 cup ketchup
4 oz American cheese, sliced
Box Jiffy Corn Mix (plus the egg and milk it calls for)

And for the topping
14.5 oz can stewed tomatoes
2 tsp cornstarch
1 tsp Worcestershire sauce

1. Preheat oven to 350.  Cook ground beef and onion in skillet till the beef is browned.  Drain fat.

2. Combine beef and onion mixture with ketchup.  Spread evenly in 8×8 baking dish.

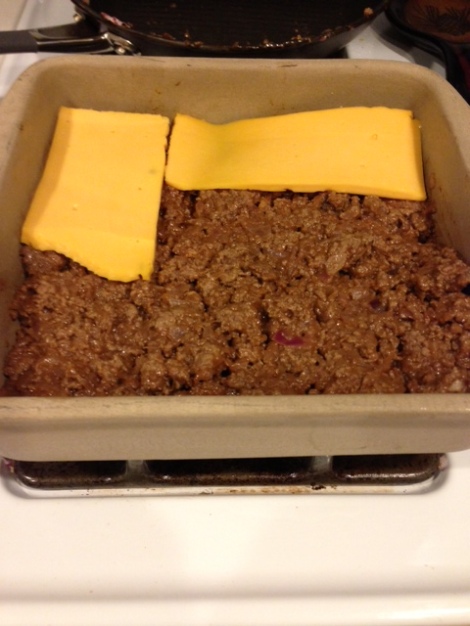
3. Lay slices of cheese over beef.  Make sure you slice the cheese thin enough you can cover the whole thing – it will melt better too (mine was a bit too thick).

Image

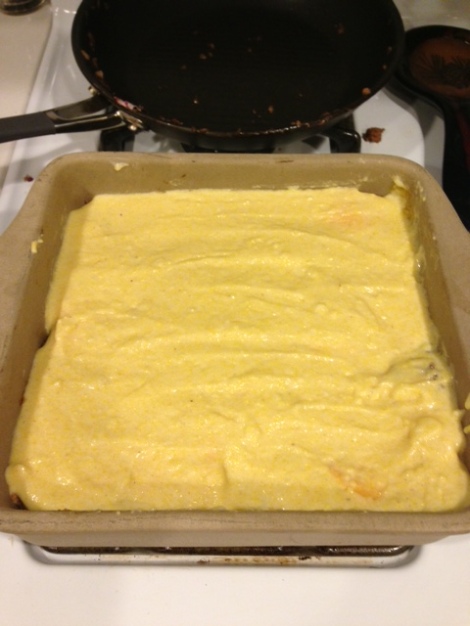
4. Prepare cornbread mix according to the box, spread over the top.  

Image

Bake for 25 mins or until the cornbread is done (I use the ol’ toothpick to check).  Take out of the oven and let it sit for 5 minutes.

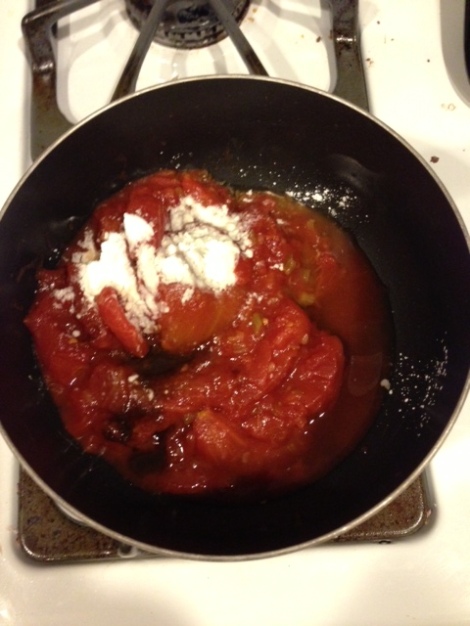
5. During the five mins, combine the topping ingredients in a medium saucepan and heat and stir till bubbly and slightly thickened.  If your family is big on toppings, you might want to make two batches of the tomato mixture.

Image

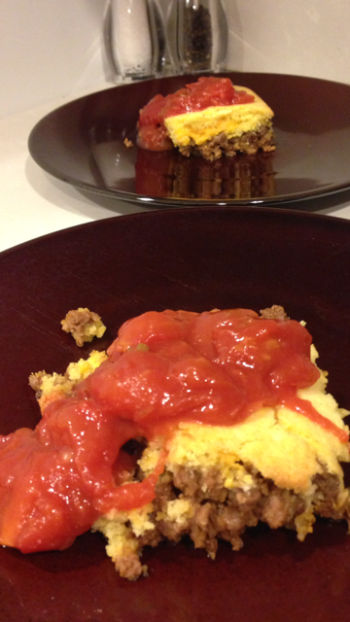
Serve up and top with tomato mixture – yum yum!!  

Image

You can see my mama’s post I got this from here: http://recipes2good2b4gotten.com/page/2


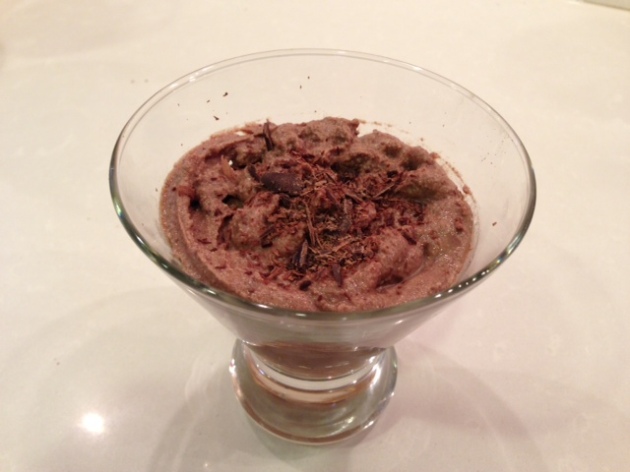
Gluten Free Chocolate Mousse

One of my best buds is gluten free, and it causes her to give a lot of preparation when our crew gets together – often times bringing her own food.  We were having her and her husband over for dinner, and I wanted to have something scrumptious that she could eat for dessert – surprisingly, it was easy, both to find and to make!  This recipe is DElicious, and only 3 ingredients (YES!!).

Ingredients:
15 oz ricotta
2 tbs powdered sugar
4 oz semi-sweet chocolate chips (or I suppose it doesn’t need to be in chip format – just meltable)
Milk (just a little)
Extra chocolate for shaving

1. Melt your chocolate, I just used the microwave at 30 second intervals (so I wouldn’t burn it) till it was smooth

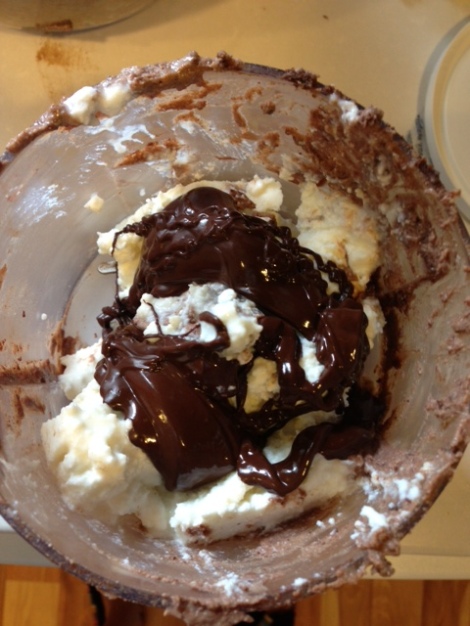
2. Add ricotta, powdered sugar, and chocolate to food processor

Image

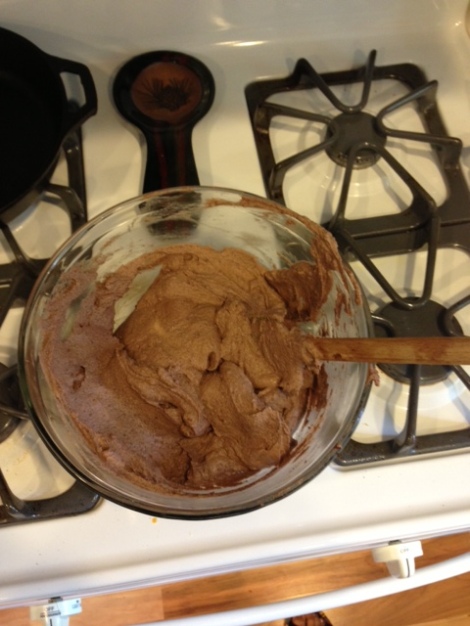
3. Mix until smooth.  I was having trouble getting it smooth, so I added a bit of milk

Image

4. Scoop into four glasses – although I have to admit, while this is delicious, it’s so rich that none of us finished our whole serving.  I think you could probably get six servings out of it.

5. Shave some chocolate on top, and enjoy!

Image


I found this recipe on RealSimple.com (original recipe here http://www.realsimple.com/food-recipes/browse-all-recipes/chocolate-ricotta-mousse-00000000008034/index.html), they have lots of other gluten free recipes as well.

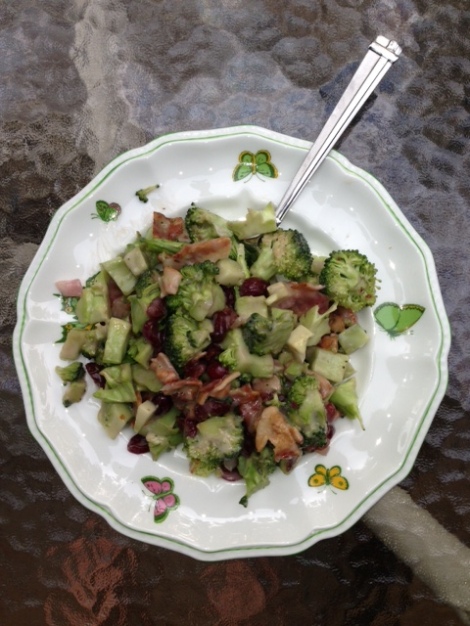
Bacon Broccoli Berry Salad

This is a recipe developed by my mama.  Perfect for summer dinner on the deck – and so easy!

Image

8 slices of crisp cooked bacon, crumbled
1 bunch broccoli, cut up
1/2 cup dried cranberries
3/4 cup Light Miracle Whip
1/3 cup sugar  (1/4 if you want to tone down the sweetness)
3 tablespoons raspberry or cider vinegar
1/2 cup finely chopped red onion

1. In a very large bowl stir together Miracle Whip, sugar, and vinegar.

2. Place red onion and cranberries in a colander; pour boiling water over. Drain well.

3. Combine dressing mixture, onion and cranberry mixture, and broccoli and bacon. Chill several hours and enjoy!

If you’re curious as to why the boiling water in #2 – it softens the cranberries a bit, and takes some bite out of the onion.  Who knew?!

Screen shot 2013-07-26 at 2.05.09 PM


New Uses for Common Kitchen Items

I love reading posts with tips to make life easier with small, everyday changes – so I thought I’d try one of my own!!  Most of these are courtesy of my mother (especially the food ones), things I’ve known so long I don’t remember how I know them, or Real Simple magazine (which I LOVE).

Screen shot 2013-07-22 at 11.11.04 AM

Bread – surprisingly helpful…

1. Hold a piece of bread in your mouth when you slice an onion.  Your eyes won’t sting!  (Serious!  This is not just a ploy to get you to look silly with a piece of bread hanging out of your mouth).

2. When storing cookies in a tupperware, put a piece of bread in with them – it will keep them moist (don’t you love that word?!).

3. Brown sugar hard as a rock?  Throw half a slice of bread in for 12 hours – the moisture in the bread will soften it right up!

Kitchen items and their unintended uses…

4. If you want to make cool designs with pancakes (numbers on birthdays, etc.) use a turkey baster – batter writing made easy!

5. A potato masher may be great for, well, pototoes…but it’s also super helpful when making guac!  Mash up your avocados with this tool instead of a fork.

6. When making the previously mentioned guac, if your avocados aren’t ripe enough, put them in a paper bag with a banana on a windowsill for a day or so.  If you need the guac right meow, blend them with a cup of peas.

7. I could never get the apple corer to go straight down, I always ended up with a few slices having the stem on them.  Then a women commented on a blog post with this wonderful tip – turn the apple upside-down.  This tip has changed my life.

8. Use an empty kleenex box to store bags.  It’s convenient, and looks nicer than the bag-stuffed-full-of-other-bags.  We have one on our fridge for lunches, and one in the front closet for doggie walking.

Screen shot 2013-07-22 at 11.17.03 AM

9. If you can’t open a jar, and no one stronger than you is around, grab a piece of sandpaper to give you a better grip on the lid (hopefully the someone stronger than you and the someone who knows where the sandpaper is are not the same person.  Also I know that sandpaper is not a kitchen item.).

And when you’re cooking…

8. I’m a huge fan of using scissors for basically everything in the kitchen (used to drive my roommate CRAZY when I cut pizza with kitchen sheers).  But for reals – if you need to chop some herbs, put them in a measuring cup and cut them with scissors.  Easy, and all the bits stay in one spot!

9. If you need a tsp of an expired spice, and you don’t want to run to the store, add an extra 1/2 tsp.  It will make up for the loss of flavor, but not be overpowering.

10.  When baking bread, grease the loaf pan half way up.  This will give you a nice rounded top without a ridge around the top edge (this tip greatly impressed the judge in 4H when she tasted my banana bread oh, 20 years ago).

11.  Need cooked chicken for a recipe?  Grab a rotisserie chicken on your way home from work – delicious, and you don’t have to take the time to do it yourself.

12.  Line pans with tin foil – afterward you can throw the foil out, and the pan is still clean.

Other random goodies…

13.  My bff Molly gets the credit for this one – use painters bibs from Ikea (or wherever else you can find them) as your kiddo’s regular dinner bib.  God knows the food doesn’t stay only three inches below it’s intended destination.

Screen shot 2013-07-22 at 11.24.29 AM

14. To make unloading the dishwasher faster, put all the same utensils in the same compartment in the silverware basket.  Then when it comes time to empty, grab one handful of spoons, one handful of forks, etc.  Just make sure they don’t all “spoon” each other, face some forward, some backward, some with the handle up, some with the handle down, etc.).

15. Use ice-cubes to water your hanging baskets.  They’ll melt slow enough that you won’t have a ton of water dripping all over your driveway.  If you have large potted plants, fill an empty wine bottle with water and stick it upsidedown in the plant –  it will seep into the soil as needed, so your plant has a steady supply of water for days!

S’more Cups

This is my favorite Pampered Chef recipe (also, the only one I’ve ever tried ;-)).  Easy to make, a little too easy to pop like popcorn when you’re sitting on the deck or around the fire pit.

Image

What you need

6 tbs butter

1 cup graham cracker crumbs

1/4 cup powdered sugar

4 Hershey bars

12 big marshmallows

Mini cupcake pans

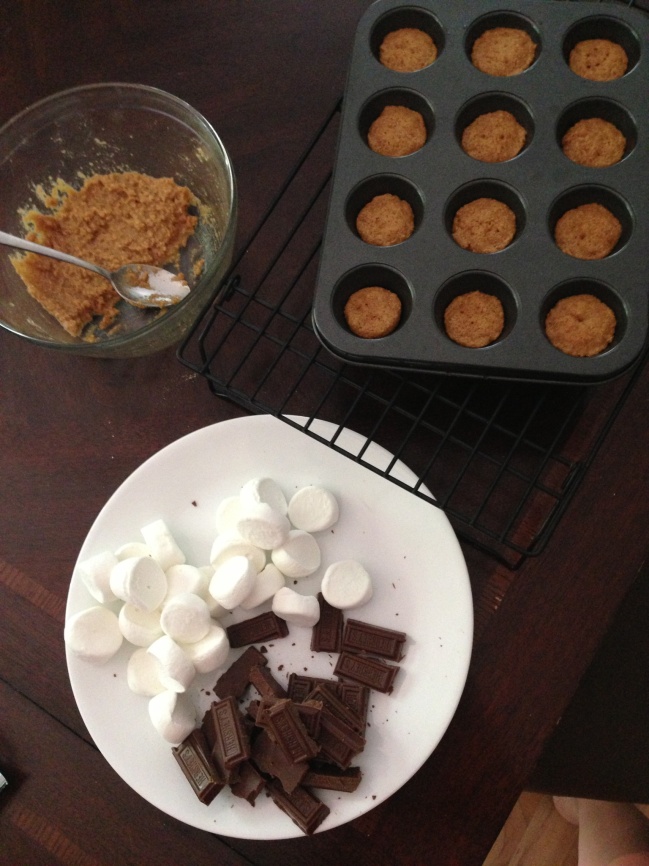
1.  Preheat oven to 350.  Melt the butter in a midsize bowl.  Add the graham cracker crumbs and powdered sugar.  Press into the mini-cupcake pans (makes 24, so make sure you don’t put too much in or you’ll be stealing from the first ones to make the last ones).

Image

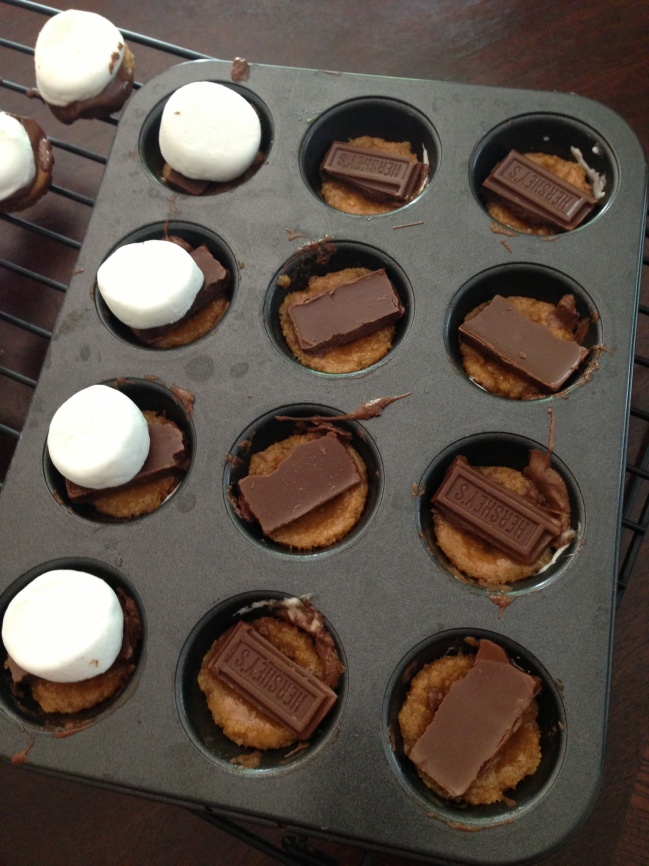
2.  Bake for 4 minutes.  Break apart two of the Hershey bars and cut the 12 marshmallows in half.  Top each crust with one chocolate rectangle and one half marshmallow.  Bake for another two minutes.

Image

3.  Let cool in the pan for 15 mins and then another 5-10 on a cooling rack once you take them out (I used a spoon to pop them out).  When they’re almost cool, melt the other two Hershey bars on the microwave…30 seconds, stir, then another 20.

4.  When the cookies are cool, dip them upside-down in the chocolate.  Let them sit till the chocolate hardens, or throw them in the fridge (I think they’re even better cold!).  Enjoy!

See the original recipe here: http://www.pamperedchef.com/recipe_search/recipe.jsp?id=91599